Post-production
Color grading: primary, secondary, and your first LUT
A working approach to grading footage so it looks like a film, not a phone capture
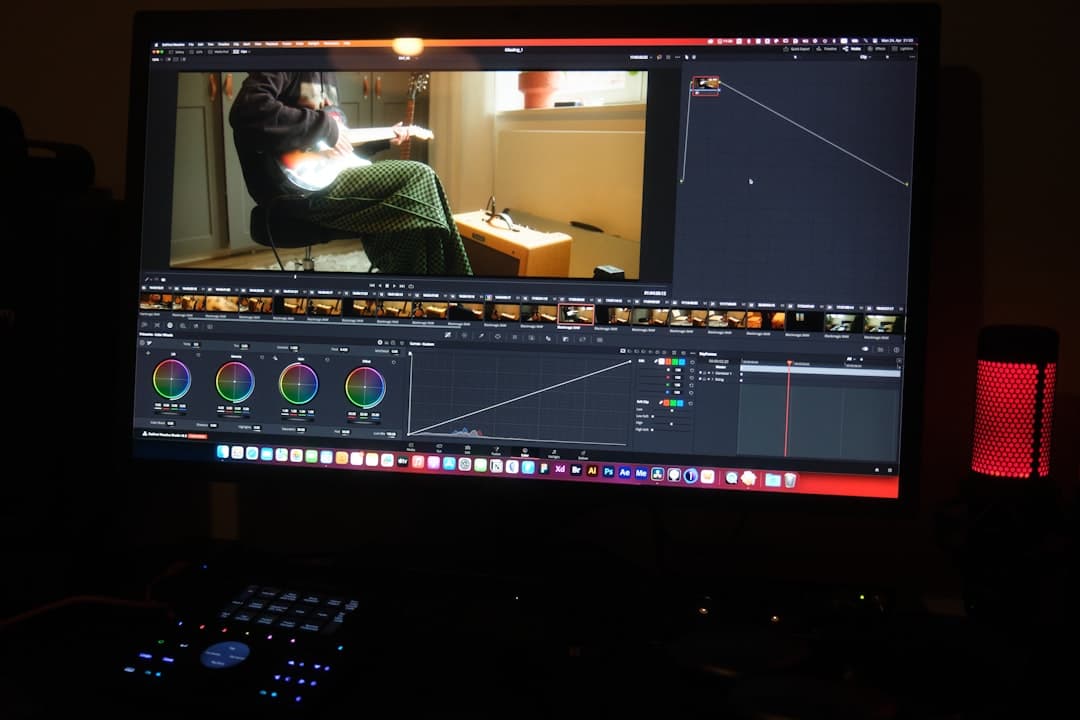
Photo by Alan Alves on Unsplash
What grading actually does
Color grading is the process of adjusting the color and luminance of footage in post. It does two distinct jobs:
- Correction — fixing what went wrong in capture (white balance off, exposure swings, mixed-temp lights, soft black levels).
- Looks — building an intentional aesthetic on top of the corrected image. The "Hollywood look," the "Netflix teal," the "indie warm."
Doing both in the same step is the most common newcomer mistake. Correction first, look on top. The order matters because a look applied to bad footage just makes the badness more dramatic.
The three-stage workflow
Working colorists structure every grade in three stages:
- Primary correction — image-wide adjustments to fix exposure, white balance, contrast, and saturation. The whole frame moves together.
- Secondary correction — targeted fixes to specific regions: skin tones, sky, a wall, a sign. Just one part of the frame.
- Look / creative grade — the intentional aesthetic. Applied via LUT or hand-built.
Always work top-down: primary first, then secondary, then look. Inside each stage, multiple adjustments may stack.
Primary correction
Open your color tool (Resolve, Premiere Lumetri, FCP color wheels). For each clip, in this order:
1. White balance. Use the eyedropper to sample a known-neutral area (white wall, gray card, white shirt). The image should snap to neutral. If you shot in log or raw, you have wide latitude here; if you shot a baked-in REC709 profile, you're more constrained.
2. Exposure. Look at your scopes (waveform monitor). Adjust the exposure or gain wheel until:
- Black point sits around 0 IRE (toes touching but not crushed)
- White point sits around 90–100 IRE (highlights rolling off but not blown)
- Midtones look natural — skin tones around 50–60 IRE
3. Contrast. Push contrast slightly (10–20%) to give the image some snap. Too much and you'll lose detail in shadows; too little and the image looks flat.
4. Saturation. Most modern log footage looks desaturated by default. Push saturation back to natural (often 110–130%). Skin tones should look healthy, not orange.
That's primary. The image should now look "right" — like a faithful recording of what was there.
Secondary correction
Once primary is done, you'll notice areas that need targeted work:
Skin tones. Use a HSL qualifier (hue/saturation/luminance picker) to isolate skin and bring the hue toward the orange/skin line on the vectorscope. The skin line on most vectorscopes is a known angle around 11 o'clock — skin should hug that line.
Sky or background. Often the sky needs to come down in luminance or shift toward a deeper blue, separately from the rest.
Specific objects. A bright sign distracting the eye? Power Windows (Resolve) or masks (Premiere/FCP) let you isolate and adjust just that region.
Secondary work is where the image starts to feel "finished." Each adjustment is small, but they compound.
Looks via LUT
A LUT (Look-Up Table) is a file containing a color transformation. You drop it on a clip and the image takes on that look — like an Instagram filter, but more sophisticated and precise.
Two kinds of LUTs:
- Technical LUTs — convert one color space to another (e.g., S-Log3 to REC709). These are corrective; they go BEFORE creative grading.
- Creative LUTs — apply an aesthetic. These go AFTER primary and secondary correction.
Common sources for free / paid creative LUTs:
- Camera manufacturer official LUTs (Sony, Canon, Blackmagic, RED publish theirs)
- LUT sellers (FilmConvert, Lutify.me, Color Grading Central)
- Open-source film emulations (Resolve has built-in Kodak/Fuji stock looks)
Critical rule: A LUT applied to badly-corrected footage looks worse, not better. The LUT amplifies whatever is underneath. Always correct first.
Apply the LUT, then adjust its intensity. Resolve calls this LUT mix; Premiere calls it LUT amount. Often you want the LUT at 50–70% strength so it adds character without taking over.
Reference and matching
Hold a reference next to your timeline. Two patterns:
Reference image. Drop a still from a similar production on your screen. Try to match the mood — same shadow color, same highlight tone, same skin warmth.
Reference shot. If your edit has shots from different cameras or lighting setups, grade them all to match each other. Use scopes (especially waveform and vectorscope) to see numerically that they line up, not just visually.
A piece where one shot is warm and the next is cool looks broken even if individually each shot looks fine.
Codec and bit depth matter
You can't recover what wasn't captured. If you shot 8-bit H.264 baked-in REC709, you have very limited grading latitude — push the color wheels too hard and you'll see banding (visible quantization steps in gradients).
For meaningful grading:
- Shoot at least 10-bit
- Shoot log (S-Log3, C-Log3, V-Log, RedLog) or raw
- Avoid heavy in-camera sharpening / saturation
- Record at the highest bitrate your camera offers
The grade you can do in post is constrained by the data you captured. This is the technical truth of "shoot for post."
Common mistakes
- Applying a LUT first, correcting after. Backwards. Correct first.
- Crushing blacks too hard. Detail you destroy in the grade can't come back. Watch the scopes.
- Pushing saturation past 150%. Skin starts to look orange and unnatural.
- Grading shot-by-shot in isolation. Always work in the context of the cut. A shot that looks great alone may not match the next one.
- Skin tone drift. Skin should always sit near the orange line on the vectorscope. If it drifts (too pink, too yellow, too red), pull it back.
- Trusting your eyes only. Your eyes adapt within seconds. Scopes don't. Use scopes.
What to practice this week
Take a piece of your own log footage. Build a single grade in three nodes (or three Lumetri instances):
- Node 1: White balance + exposure + contrast + saturation. Just primary.
- Node 2: HSL qualifier on skin, push toward the orange line. Just secondary.
- Node 3: Apply a creative LUT at 60% strength.
Toggle each node off and on. You'll see the contribution of each stage. That separation is the working colorist's mental model — keep it as you grow.
More lessons
Browse all
Audio
Audio fundamentals for video
Why bad audio kills good footage — and how to capture clean sound on a small crew

Audio
Multi-track audio workflow for narrative
Capturing lavs, boom, ambience, and timecode reference cleanly on a multi-input recorder
Business & freelance
Showcasing your work online
A reel that gets calls back, a portfolio site that works, and the basics of being findable
Found this useful?
Bookmark BOLD University and share it with someone learning the craft. New lessons go up regularly.
Back to University