Lenses
Lens character: bokeh, flare, breathing, and MTF
Why two 50mm lenses can produce wildly different images
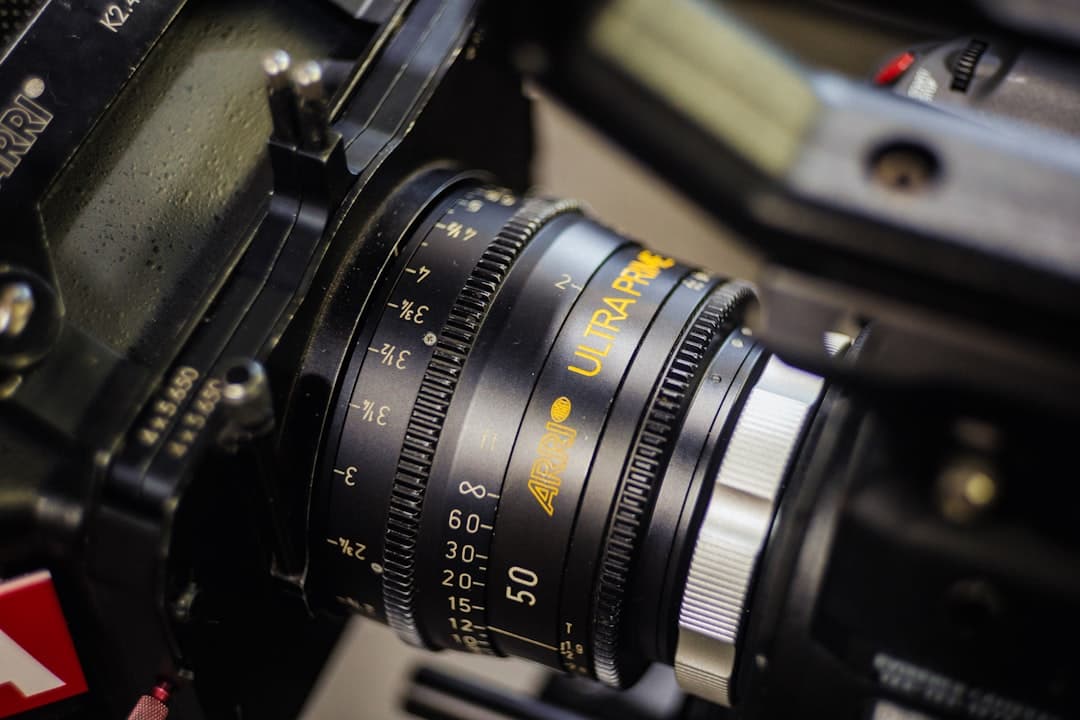
Photo by Jason Leung on Unsplash
When "50mm at T1.4" isn't enough information
A spec sheet tells you a lens is 50mm, opens to T1.4, weighs a kilo. It does not tell you that this particular 50mm produces creamy round bokeh while another 50mm produces angular polygons. Or that this 50mm flares into beautiful blue streaks when a streetlight hits it, while another 50mm flares into ugly green ghosts. Or that one of them shifts magnification visibly when you pull focus and the other doesn't.
This is lens character — the subjective, hard-to-spec qualities that differentiate one lens design from another. Working cinematographers and lens technicians obsess over it because it determines the feel of a project at a level deeper than just "what's in focus."
This lesson is about reading and choosing lens character intentionally.
Bokeh: the shape of out-of-focus
Bokeh refers to how a lens renders out-of-focus areas — specifically, the quality and shape of those areas. Two factors drive it:
Aperture blade count and shape. The iris (aperture) inside a lens has physical blades that close down to control how much light gets through. Modern lenses use 7-11 blades. Older lenses sometimes used 5 or 6. The shape of the closed-down iris determines the shape of out-of-focus highlights:
- Round iris (9+ blades, curved) — bokeh appears as circles or near-circles. The classic "cinematic" round bokeh.
- Polygonal iris (5-6 straight blades) — bokeh appears as hexagons or pentagons. Older lenses, vintage cinema lenses, some modern prime designs that lean retro.
- Cat's-eye / lemon shapes — happens near the edges of the frame on many lenses due to optical vignetting cutting circular bokeh into elongated shapes. Some look organic; some look like a defect.
Spherical aberration. A perfectly corrected lens produces flat, evenly-lit bokeh discs. A lens with residual spherical aberration produces bokeh with brighter edges (creating "soap-bubble" bokeh — distinct, beautiful, occasionally controversial) or brighter centers (smooth, creamy, less defined). The latter is what modern cinematographers usually want.
When you hear "the Cooke look" or "the Leica look" — that's largely bokeh character. Cooke lenses are known for slightly warm color and rounded, organic bokeh. Leica's older cinema lenses have very smooth bokeh with subtle edge falloff.
Flare: how a lens handles bright light
Flare is the artifact created when a bright light source enters or hits the lens — direct sun, headlights, neon, anything intense. Modern coatings reduce flare; vintage and intentionally minimal-coated lenses embrace it.
Three categories:
Veiling flare. A whitewashing of contrast across the frame when a bright source is just outside the frame. The image goes a bit "milky." Some directors love this look (J.J. Abrams was famous for it during the Star Trek reboots — anamorphic lenses with intentional flare). Some hate it.
Ghost flare. Discrete shapes (circles, polygons, streaks) created by reflections between glass elements inside the lens. The ghosts move as the camera or light moves. The shape depends on iris design and coatings.
Anamorphic flare. Anamorphic lenses (which compress the image horizontally for widescreen) produce horizontal blue streaks when a strong light enters the lens — a signature look that you've seen in every Hollywood blockbuster from the last 50 years. Spherical lenses don't do this. The look is so beloved that some lens companies sell "flare add-on" filters to fake it.
Coating philosophy. Modern lenses have multi-coated glass that minimizes flare. Vintage and "characterful" lenses are often single-coated or uncoated, deliberately maintaining the flare-prone behavior. Some modern lens lines (Sigma Cine FF Classic, Cooke SP3, ARRI's vintage-look glass) intentionally simulate vintage flare characteristics.
When picking lenses for a project, ask the manufacturer or lens technician: how does this lens flare? Get a test reel.
MTF: the technical sharpness curve
MTF (Modulation Transfer Function) is the technical measure of a lens's resolving power — how much fine detail it can transfer from the world to the sensor. Plotted on an MTF chart:
- The X-axis shows distance from the center of the lens out to the corner
- The Y-axis shows contrast (0 to 100%)
- Multiple curves represent different spatial frequencies (rough detail, medium detail, fine detail)
Higher curves = sharper lens. A perfect lens would be a flat 100% line across all positions. Real lenses always taper toward the corners.
What MTF tells you:
- Center sharpness — how good the lens is at its best
- Corner sharpness — whether edges hold up
- Falloff pattern — how quickly the lens loses resolution as you move toward edges
- Sagittal vs. tangential differences — whether the lens behaves differently for radial vs. circumferential detail
For cinema work, mid-frame sharpness matters more than corner sharpness — most action happens away from the corners. But corner softness is visible in landscape and architectural work.
Some cinematographers prefer lower MTF lenses for narrative work — modern lenses are sometimes "too sharp" in a way that reads as digital/clinical. Vintage and "softer" modern lenses (Sigma Cine Classic, Atlas Orion Silver, Cooke S7/i FF+) deliberately soften the image to feel filmic.
Focus breathing
Focus breathing is the change in apparent magnification when you pull focus from one distance to another. Some lenses zoom slightly as you focus closer (subject appears to grow); some shift the opposite way. A perfectly designed cinema lens has near-zero breathing — focus pulls don't disturb the framing.
Stills lenses (Canon EF, Sony E primes, etc.) usually have visible breathing. It's not a problem for photography but it's distracting in video when you pull focus during a take. Pro cinema lenses (ARRI Master Primes, Cooke S4/i, Zeiss Supremes) advertise "minimal breathing" as a feature.
If you're working with stills lenses for cinema, test focus breathing during prep. Some lenses are subtle and you'll never notice; others are dramatic.
Distortion
A lens projects 3D space onto a 2D sensor — but the projection isn't always faithful. Two main types:
Barrel distortion — straight lines bow outward (the image looks like it's projected onto a barrel). Common on wide lenses, especially zooms at their widest.
Pincushion distortion — straight lines bow inward. Common on telephoto lenses.
Mustache distortion — both, in different parts of the frame. Common on some zooms.
Modern lenses correct for distortion well, but at extreme focal lengths or wide zooms, you'll see it. Modern cinema cameras can correct distortion in post if you log the lens metadata.
For interview work or product, distortion matters less. For architecture or anything with strong straight lines, it matters a lot.
Lens color and contrast
Different lens designs (especially across manufacturers) produce different color rendering. Older Cooke lenses are famously warm; older Zeiss B-Speeds are neutral-leaning-cool; Leica R-mount lenses have a distinctive saturated palette.
Modern cinema lenses are mostly engineered for neutral color, but you'll still see differences — especially between sister lenses from different manufacturers. Match a project's lenses to one family or test carefully if you're mixing.
Contrast also varies. Vintage lenses tend to lower-contrast (less aggressive blacks, softer shadows). Modern lenses are higher-contrast. Some cinematographers chase vintage glass specifically for lower-contrast cinematic feel.
Putting it together: choosing a lens for a project
When prepping a project, working DPs go through a process:
- Identify the visual goals — period? era? mood?
- Build a short list of lens lines based on broad character (modern clean, vintage warm, etc.)
- Schedule a lens test at a rental house with the actual camera body
- Shoot test charts and a real person under controlled light, at common apertures
- Watch on a calibrated monitor with the look the project will use
- Decide based on character, not specs
This is why working cinematographers often have a "set" of lenses they've used on multiple projects — the lens character becomes part of their visual signature.
Common mistakes
- Trusting specs alone. Two lenses with the same numbers can produce wildly different images.
- Ignoring flare behavior. Then a streetlight ruins a take.
- Mixing lens families on a single project. Visible mismatches between scenes.
- Wide-open shots without testing. The bokeh quality at T1.4 isn't always what you expect.
- Forgetting breathing during focus pulls. A take ruined by visible zoom-during-pull.
- Underestimating distortion on a wide. Faces in the corners go barrel-shaped.
What to practice this week
If you have access to two different lenses at the same focal length (say, two 50mms — even a cheap kit lens and a vintage prime), shoot the same scene:
- The same shot
- Wide open
- Around the same exposure
- Including a strong light source somewhere in or near the frame
- With a slow focus pull from one subject distance to another
Compare side by side. You'll see:
- Different bokeh shape and character
- Different flare patterns
- Different sharpness profiles
- Possibly different focus breathing
The differences will be larger than you expect. After this exercise, you'll start thinking about lens choice as a creative decision on par with lighting choice — not just "what's the right focal length."
Lens character is one of the last frontiers a cinematographer learns to read. Once you can, you'll never look at a film the same way again.
More lessons
Browse all
Audio
Audio fundamentals for video
Why bad audio kills good footage — and how to capture clean sound on a small crew
Audio
Multi-track audio workflow for narrative
Capturing lavs, boom, ambience, and timecode reference cleanly on a multi-input recorder
Business & freelance
Showcasing your work online
A reel that gets calls back, a portfolio site that works, and the basics of being findable
Found this useful?
Bookmark BOLD University and share it with someone learning the craft. New lessons go up regularly.
Back to University