Lighting
Natural light cinematography
Working with the sun, sky, and what you find — without lighting kits
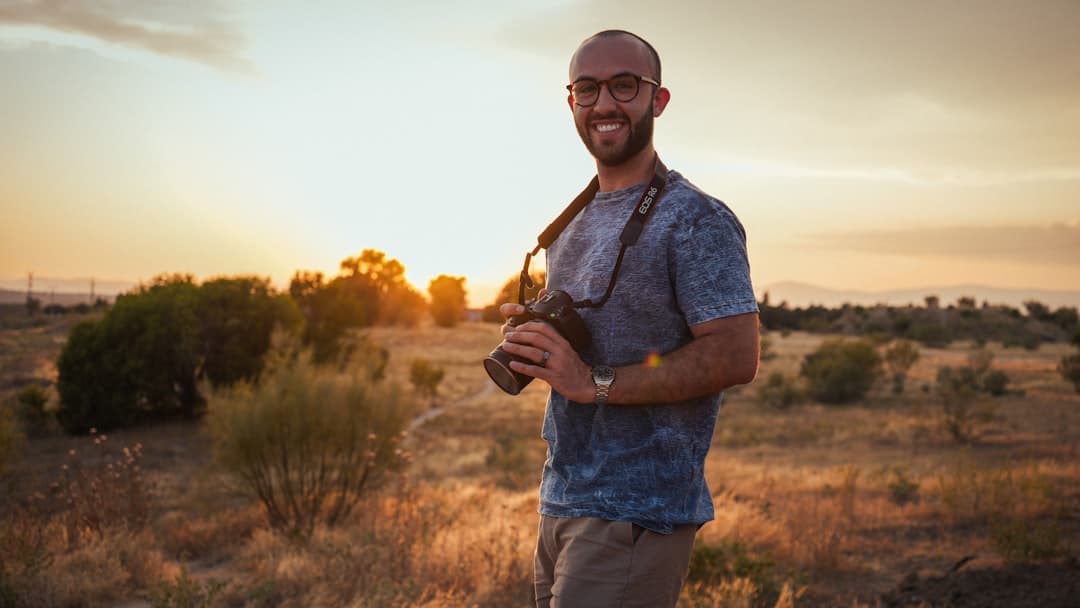
Photo by Ian Deneumostier on Unsplash
Why natural light is its own craft
Studio lighting is about creating an effect from scratch. Natural light cinematography is the opposite: the light is already there, and your job is to read it, predict it, and shape what exists. It's a completely different skill set, and a beautiful one — most of the most celebrated cinematography in history (Malick, Lubezki, Wong Kar-wai) leans hard on it.
It's also more honest than studio work. The sun doesn't take direction. Clouds don't hit their marks. You learn to plan, adapt, and capitulate gracefully when the weather wins.
The four times of day
Outdoor light is a moving target across the day. Roughly:
Sunrise (~45 min before to ~30 min after). Soft, warm, low-angle light. Long shadows. Color around 3,000–4,000K. Disappears fast — you have maybe 60–90 minutes of "the magic" before the sun is too high and the light flattens out.
Morning to mid-morning (~9am-11am). The sun is climbing. Shadows shorten. Color temperature climbs toward 5,600K. Still flattering for faces — the angle is steep enough to model features but not yet overhead.
Mid-day (~11am-2pm). Hardest light of the day. The sun is overhead, creating dark shadows under noses and eye sockets ("raccoon eyes"). Universally considered the worst time to shoot people outdoors. Unless you're working with a giant 12×12 silk overhead to soften it (or it's overcast), schedule around it.
Afternoon to golden hour (~5pm to sunset, depending on latitude/season). The reverse of sunrise. The sun lowers, shadows lengthen, color warms. Beautiful. Same finite window — about an hour of golden light before it's gone.
Sunset (~30 min before to ~15 min after). The sun touches the horizon. Color goes deeply warm (~2,500–3,000K). Sky becomes a soft fill from above. Magnificent for wide shots but tough on details — light is fading too quickly to do multiple setups.
Blue hour (15-45 min after sunset). The sun is gone but the sky is still lit. Soft, even, blueish light from overhead. Beautiful for cityscapes, exteriors of buildings, and shots that want a "twilight" feeling. Same 30-45 minute window.
Night. Different lesson.
Golden hour scheduling
For most narrative outdoor work, you want light at one of two angles: low and warm (golden hour) or soft and overhead (overcast / open shade / silk-covered).
If golden hour is the target, the day's schedule revolves around the sunset clock:
- Scout the location and check the sun path (apps like Helios, PhotoPills, Sun Surveyor show where the sun will rise/set on any date)
- Block the scene the day before or hours ahead so blocking is locked
- Be camera-ready 90 minutes before sunset, with all gear staged, talent in wardrobe, framing locked
- Roll the moment the light hits the target. Shoot the highest-value coverage first (the master and the over-the-shoulders), then move to close-ups
- Stop when the sun touches the horizon. The light disappears in minutes after that
A common amateur mistake: scheduling the rehearsal at golden hour. By the time you've blocked, set marks, fixed wardrobe, and called action, the light is gone. Block earlier; shoot during the magic.
Reading the sun
Three properties to read:
Direction. Which way is the sun? Backlight (sun behind subject) creates rim and separation but blows out the background. Frontlight (sun behind camera) flattens faces and reads as "tourist photo." Side light (sun 45° off camera axis) is generally the most flattering — natural three-quarter modeling.
Hardness. Direct sunlight on a clear day is hard. Cloud cover diffuses it — overcast days produce huge, soft natural light. White-cloud days are different from gray-cloud days: white clouds = bright soft light; gray clouds = dim soft light. Both can be beautiful but you need to read which you have.
Color temperature. Direct sun ≈ 5,600K. Open shade (away from direct sun but with sky overhead) is cooler — 6,500-8,000K. The shaded side of a building under blue sky might be 10,000K. White-balance accordingly, or fight the cool with a warm bounce/gel.
Shaping natural light with grip
The same grip tools used indoors work outdoors — sometimes scaled up.
Negative fill. A black flag or 4×4 floppy on the shadow side of your subject deepens the shadow side, increasing contrast. Crucial for outdoor portraits: open shade alone produces flat, low-contrast light. Adding negative fill carves out features. This is the single biggest "looks like a real DP shot it" trick for outdoor work.
Bounce. A 4×4 bounce card (or even a piece of white foamcore) on the shadow side opens up the shadows without adding a fixture. Especially useful when you need fill but the only natural fill source (sky bounce) is too dim.
Silk overhead. A 6×6 or 12×12 silk frame held above the subject by two c-stands turns hard mid-day sun into soft overhead light. This is a major workflow on bigger outdoor shoots — overhead silks let you shoot at any time of day.
Solid (overhead). A 6×6 or 12×12 black solid (a "solid" is a non-translucent black panel) completely blocks direct sun. Useful when you want to put your subject in open shade right next to direct sun — the solid creates a portable shaded area.
Reflector. A folding round reflector (silver or gold) is the small-kit version of a bounce. Less powerful than a 4×4 board but fits in a backpack.
Diffusion fabric on a frame. A "silk" is a frame with white translucent fabric. Smaller frames (4×4, 6×6) handle individual close-ups; bigger ones cover whole scenes.
The "available light" mindset
There's a difference between using natural light and fighting natural light. The cinematographer Roger Deakins (no point in pretending otherwise — he's the reference) talks about working with what the location and time give you, rather than overlighting the scene with fixtures to make every frame look the same.
This means:
- Embrace high contrast. Don't try to fill every shadow.
- Embrace soft/diffused days. Overcast skies are a giant softbox.
- Embrace the constraints. If the location only has good light at 4pm, schedule the scene for 4pm.
- Use small modifications. A reflector, a flag, a silk. Not a 1.2K HMI.
This approach reads as documentary or naturalistic. It doesn't mean "unstyled" — it means the styling comes from finding and modifying what's there, not from manufacturing it.
When natural alone isn't enough
Sometimes the natural light won't carry the shot. Options for adding to it without losing the natural look:
A small HMI or LED on a stand, set behind/beside the subject, dialed under the sun's intensity — a subtle key that mimics natural directionality.
A bounce card just out of frame — frequently the difference between flat and flattering.
A practical fixture in frame (a lamp, a window) that motivates a brighter pool of light on the subject. The audience sees the lamp; their brain accepts that the lamp is "lighting" the subject; you can be lit by a fixture beside the lamp that's much brighter than the lamp ever was.
The trick is motivation. If you can point to a believable source for the extra light (sun, window, lamp, fire), the audience accepts the augmentation. If you can't, the lighting reads as "lit."
Common mistakes
- Mid-day exterior portraits. Schedule them for golden hour or shaded light. Or rig overhead diffusion.
- Sun directly behind camera (front lighting). Universally unflattering. Move the camera or the talent.
- Forgetting that golden hour is finite. Plan to shoot one or two setups during the actual magic; pre-light and rehearse around it.
- Hard backlight without fill. The talent's face goes black. Add a silver reflector to bounce the sun back onto their face, or use negative fill on the shadow side combined with a strong bounce on the camera side.
- Forgetting wardrobe in sun. Black absorbs heat; light-colored clothing reflects light onto faces (sometimes helpful, sometimes a green-shirt-tints-the-skin disaster). Plan wardrobe for the light.
- Ignoring weather. Bring a backup plan for rain or clouds. Sometimes the weather creates better light than you planned for — be ready to roll with it.
What to practice this week
Pick a person. Pick an outdoor location with at least two distinct lighting conditions (open shade + direct sun, for example). Shoot the same close-up portrait composition in:
- Direct mid-day sun, no modification
- Direct mid-day sun, with a 4×4 silk diffusion overhead
- Open shade, no modification
- Open shade, with a black flag adding negative fill
- Golden hour, backlight + small reflector fill
Compare the five back to back. You'll see exactly what reflectors, silks, and negative fill do to the same face. After this exercise, you'll start reading outdoor light like a DP — looking for the modifications to make, not the fixtures to set up.
The sun is the biggest light you'll ever work with. Learning to shape it is the difference between "I shot outside" and "I lit the scene with natural light."
More lessons
Browse all
Audio
Audio fundamentals for video
Why bad audio kills good footage — and how to capture clean sound on a small crew
Audio
Multi-track audio workflow for narrative
Capturing lavs, boom, ambience, and timecode reference cleanly on a multi-input recorder
Business & freelance
Showcasing your work online
A reel that gets calls back, a portfolio site that works, and the basics of being findable
Found this useful?
Bookmark BOLD University and share it with someone learning the craft. New lessons go up regularly.
Back to University