Camera & rigging
Building a camera rig that doesn’t fight you
Handheld, shoulder, and gimbal — what to build for what shoot
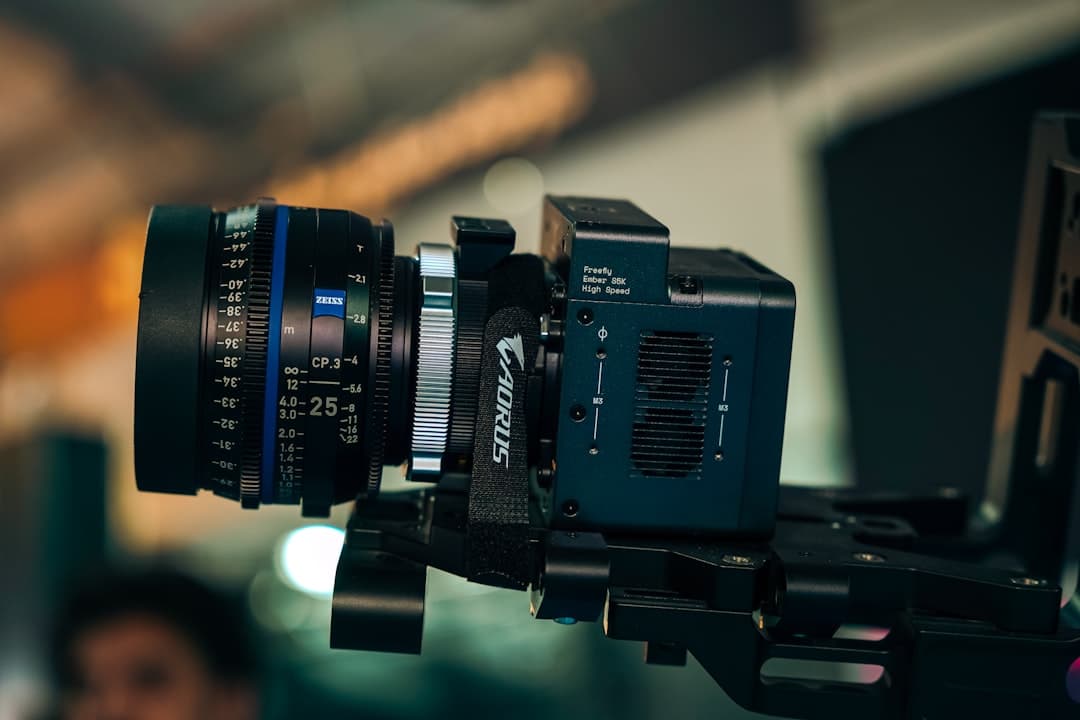
Photo by Hossein Nasr on Unsplash
Why "the rig matters"
A bare cinema camera body, plopped on top of a tripod or held in your hands, can technically shoot. But "technically" is doing a lot of work in that sentence. What you actually want is a rig — a configuration of camera, support, monitoring, power, and accessories — that lets you focus on the shot instead of fighting the gear.
Three rig styles dominate professional work:
- Handheld (camera in hand, no support)
- Shoulder (camera mounted to a shoulder pad, weight balanced front-and-back)
- Gimbal (camera floated on a motorized 3-axis stabilizer)
There's also tripod work (locked off) and Steadicam (a body-mounted mechanical stabilizer), but the three above cover most working-day decisions.
The components of a rig
Almost every rig is built around these pieces. You don't always need all of them:
- Camera body — the imaging part
- Lens — the optical part
- Baseplate — a plate that screws into the camera and accepts...
- 15mm or 19mm rods — standardized horizontal rails that hold accessories
- Top handle — for low-angle work and quick repositioning
- Side grips / wooden handles — for handheld shooting
- Matte box — light shading and filter holder mounted on the rods in front of the lens
- Follow focus — geared focus puller; pro sets often use wireless follow focus
- Monitor — external screen so you can actually see the image (camera screens are tiny and often hard to use under sunlight)
- External recorder (sometimes) — to capture higher-quality codecs than the camera writes internally
- V-mount or Gold-mount battery plate — pro-grade power; runs the camera plus accessories from one big battery
- Wireless video / SDI cable — to send the image to a director monitor or the AC's screen
- Shoulder pad — for shoulder-mounted work; balances weight
- Counterweight (for shoulder) — sits behind the operator's head to balance lens weight
- Top mount platforms — for wireless receivers, audio gear, follow-focus motors
You don't bolt all of these on at once. The art of rigging is putting on what you need for the shot and taking off what you don't.
Handheld rigs
The job: a lightweight setup you can run, walk, or sit with. Common pieces:
- Camera body
- Lens (often a wide-to-normal prime — long lenses amplify shake)
- Top handle
- Side handles or wooden grips on rods, OR an integrated cage
- Small on-camera monitor
- Battery (camera or small V-mount)
The key tradeoff: weight vs. shake control. A heavier camera shakes less because there's more inertia resisting your hand movements. But you'll fatigue faster. For a 4-hour handheld shoot, lighter is better; for a 30-second handheld shot in a longer day, heavier is more stable.
A common newcomer mistake: building a handheld rig that's too long front-to-back. Long rigs ("battleship rigs") shake more, not less, because the lever arm amplifies movement. Keep handheld rigs compact.
Shoulder rigs
The job: distribute camera weight onto your shoulder so your arms aren't doing all the work, and let you keep the camera level for long periods.
Shoulder rigs need to be balanced front-and-back so the camera doesn't tip forward when you let go. This means a counterweight (usually a battery) behind your shoulder to offset the lens and matte box in front. A well-balanced shoulder rig feels like it's just floating there — you're not holding it up, you're stabilizing it.
Common pieces beyond the handheld kit:
- Shoulder pad on a baseplate
- 15mm rods extending front (for matte box/follow focus) and rear (for counterweight)
- V-mount battery in rear
- A larger external monitor on the top handle
- Wireless follow focus
Shoulder shooting requires practice. Your arms aren't lifting the camera, they're guiding it. Lock your elbows into your body for stability. Breathe deliberately. Move from your hips, not your hands.
Gimbals
The job: smooth movement. A gimbal uses three motors to keep the camera level even when you walk, run, or move erratically.
Modern gimbals (Ronin, Movi, Möhre) make moves possible that even Steadicam can't easily do — running, sudden direction changes, low-mode shots inches off the ground. They've genuinely changed indie cinema.
Tradeoffs:
- Setup time. Balancing a camera on a gimbal takes 15+ minutes. Every lens change requires re-balancing. Some shoots reserve a gimbal for specific shots only.
- Weight rating. Each gimbal has a max payload. Add a heavy zoom lens and a matte box and you may exceed it.
- Battery life. Gimbals burn through batteries fast. Carry spares.
- No quick handheld pivot. A camera locked into a gimbal can't suddenly become a handheld camera. You have to remove it from the gimbal.
A common gimbal mistake: shooting everything on the gimbal because the moves look smooth. Result: footage that all has the same characterless flow. Use gimbals when the story wants flow. Use handheld when the story wants edge and proximity. Use sticks (a tripod) when the story wants stillness.
What goes on the gimbal
A well-built gimbal rig is simpler than a shoulder rig — less stuff to balance:
- Camera body
- Lens (often a compact prime or a balanced zoom)
- Internal recording (rarely external — too much weight)
- Minimal on-camera monitor (or a remote monitor for the operator)
- Wireless focus (gimbals make manual focus pulling impossible — you can't reach the lens)
- A wireless transmitter to send video to a director monitor
If you're working solo on a gimbal, autofocus from a modern Sony, Canon, or Blackmagic body is often more reliable than trying to remotely pull focus. This is one of the few situations where AF is genuinely better than manual.
Picking your starter rig
If you're shooting documentary, ENG-style, run-and-gun work: build a handheld rig with a top handle and shoulder pad. Keep it light. Add a gimbal later for specific shots.
If you're shooting narrative dialogue scenes, interviews, or controlled environments: a tripod-first approach plus occasional gimbal/handheld is more common. Stillness reads as confident; movement reads as nervous (unless intentional).
If you're shooting weddings or events: gimbal-first is the modern default. Smooth move, beautiful background blur, fast setup once you have a balance saved.
Common mistakes
- Buying every accessory before knowing the shoot. Most rookies overbuild. Start minimal. Add as you discover what you actually reach for.
- Cheap baseplates. A bad baseplate gives you a wobbly camera regardless of how nice your other gear is. Get one with proper sliding camera adjustment.
- Ignoring counterweight. A front-heavy shoulder rig will exhaust you in 20 minutes. Always balance.
- Battery anxiety. Run out of power and the shoot stops. Carry double what you think you need, charge between setups.
- Forgetting the monitor. The image on a camera-back screen at noon is invisible in sunlight. An external monitor is not optional for outdoor work.
What to practice this week
Borrow a friend's camera or rent one with a basic accessory kit. Try the same 30-second shot three ways:
- Handheld, no support
- On a tripod
- With a shoulder pad and counterweight
Same shot, same lens, same scene. Watch the three back-to-back. You'll feel — physically and visually — what each rig actually does for you.
Then pick one to learn deeply. Going broad on rigging strategies is a trap; going deep on one (especially shoulder work or gimbal) is what gets you hired.
More lessons
Browse all
Camera & rigging
Understanding depth of field
How to get the cinematic look — intentionally, not by accident
Camera & rigging
Multi-camera shooting
Matching color, syncing time, and managing the crew when you're running more than one camera
Audio
Audio fundamentals for video
Why bad audio kills good footage — and how to capture clean sound on a small crew
Found this useful?
Bookmark BOLD University and share it with someone learning the craft. New lessons go up regularly.
Back to University